Wednesday, September 29, 2010

peanut butter frosting


Who doesn't love peanut butter cups? Well this is the next best thing. Peanut butter frosting. It is light and fluffy and good on brownies, cupcakes and my favorite a spoon. This frosting is simple and delicious. So lets get started!

You will need:
1 cup butter softened
1 cup peanut butter
1 tsp vanilla
whipping cream (or milk)
2 lbs of powder sugar (give or take)

Mix butter and peanut butter until smooth. Add vanilla and 1/3 of the powder sugar. Once it is mix well add a little cream and then a little sugar. Do this until you have used all the powder sugar and reached the constancy you desire. The longer and you beat it the fluffier it becomes especially when using cream. Turn your mixer down when adding powder sugar to keep it from flying everywhere.

So there you have it one of my favorite recipes using peanut butter. you can even add cocoa to the frosting to give it a chocolaty goodness. Have fun and spoil your family today with a yummy surprise.


Monday, September 27, 2010

peanut butter snack balls


These are some of our favorite lunch treats or after school snacks.  They are similar to peanut butter playdough and the peanut butter acorns but contain a few more ingredients and crunchy cereal.  I adapted this recipe from My Cafe Kitchen.  These are one of our favorite snacks because they are very yummy, easy to make,  and also packed with fiber and protein.  The recipe is flexible for whatever you have on hand.


1 cup honey
3 cups peanut butter (creamy or crunchy)
2 cups rice krispies
2/3 - 1/4 cup applesauce (optional - I have tried it with and without)
2 cups crushed cereal (I use Cheerios,  Life, or what every cereal I have on hand )
½ cup chocolate chips or dried fruit
3-4 tablespoons powdered milk
2 cups crushed mini-wheat cereal
Mix all of the ingredients but the last two until well combined.  Add powdered milk like flour until it forms a soft cookie like dough.
I use a small cookie scoop to make the balls and then roll them in crushed frosted mini wheat cereal or the crumbs from the bottom of the box. 


We put three in snack size baggies and put them in the freezer or fridge.


They are ready for lunches or afternoon snacks.  

Saturday, September 25, 2010

favorite kitchen chopper

 We love these little food choppers and have worn out a few different kinds at our house.  I decided to try this one after spotting it at IKEA.  Like many things from IKEA it is designed better than any other we have tried.

Here are the things I love about it:
1.  It is dishwasher safe, really.  (I have had others that said they were but then could not handle the heat.)

2.  It has a bigger top than most and is easier to push.


3.  The top comes off the container so that it can be filled from the top instead of the bottom.

 4.  The little container on the bottom has a lid that fits on the bottom when not is use and on the top to store any leftovers.
5.  By pressing down and turning, it becomes much shorter so that it will fit into more spaces.                        
                  
Over all it is one of my favorite kitchen gadgets to chop nuts, olives, onions, peppers, etc.
If you are looking for one, this is the best one out there.  Happy chopping.

Friday, September 24, 2010

peanut butter acorns

 In celebration of such a beautiful fall day or maybe just because it is Friday, a fun activity with my preschooler became today's great after school snack.  We used our favorite reciepe for peanut butter playdough to create these cute little edible acorns.
After rolling the dough into balls we dipped the top into melted chocolate, and chopped nuts, and finished them off with a little piece of pretzle.
 Fun, fast, easy, and healthy. 
 And a hit with the kids.  What more could a mom ask for.  Happy Fall!!

Thursday, September 23, 2010

eggplant parmesan

I love Italian food especially when it is made with fresh ingredients. This is one of my favorite dishes it is so light and yummy, made with my favorite things from my garden, tomatoes, eggplant, basil, and garlic. So lets get started.

You will need:
1 lg. eggplant (smaller ones work great for side dishes too.)
2 cloves of garlic
1 lg. tomato
olive oil
5 basil leaves
shredded Parmesan cheese

Start by washing and cutting your eggplant into half the log way. Scoop or cut out the inside of the eggplant leaving just the skin. Chop the eggplant that you removed from the skin into small cubes. Cut the tomato into small cubes and mince garlic as well. Set a side and preheat oven to 350*. In a small pan you are going to heat up about 4 tbs of olive oil and begin to saute your garlic for about 1 min just enough to season the oil. To the pan add your eggplant and season with salt and pepper to your liking. Cook the eggplant for 2 min and remove from heat. Add chopped tomatoes to the eggplant mixture and chopped basil as well. Scoop the eggplant mixture into the eggplant shell. Top with Parmesan and bake for 10-15min. until cheese is browned and eggplant is soft.

Enjoy!

Friday, September 17, 2010

lunch baggies

The perfect Eco-friendly container that's perfect for lunches or trips to the park.
To get started you will need. Fabric, Ripstop nylon, Ribbon, Velcro: fabric supplies.


1. Cut two rectangles of patterned fabric and ripstop nylon, each 13x7".

2. Pin right sides of fabric together, with nylon on the outside.

3. Fold two pieces of 5" ribbon in half and pin them, centered on each short side. The loop should be toward the inside and approximately 1 1/2" of the tails should be showing (so the tabs can be reinforced when you stitch the Velcro).

4. Stitch each short side using a 1/2" seam allowance.


5. Turn right side out and iron the fabric side on a warm setting.

6. Pin Velcro to each short end on the ripstop nylon side, approximately 1/4" from the seam edge, as well as 1/4" from each raw edge (this will cut down on the bulk in the finished side seam).

7. Stitch Velcro in place using two lines of stitching.

8. Fold in half, right sides together, and stitch down both sides approximately 1/4" from the edge.

9. Turn right side out, press and stitch down each edge with just slightly more than a 1/4" seam, enclosing the inside seam.
These snack baggies are even machine washable- turn them inside out, place an extra piece of loop Velcro over the hook Velcro so it doesn't catch on other items, then Wash and dry as normal with like colors.


Monday, August 30, 2010

pizza lunchables


Okay so my kids love Lunchables but I refuse to buy them. With every kid needing lunch it can really add up. Well we came up with our own version of the Lunchable. Pizza seems to be the number 1 choice at our house so this is what I came up with.  I make the crust and put all the toppings into there own individual bags so that they can assemble thier own pizza at lunch. Plus they are alot more healthy with out all the preservatives.

Recipe
1 1/4 cup warm water
1 tbls yeast
1/2 tbls salt
3 c flour
Place all the ingredients into mixer and let the mixer do the work.  You will know when the dough is done because it will completely pull off from the sides of the bowl.  You want a firm dough not to tough. You may need to add more flour or use less flour. 

Cut and roll the dough into  20 balls and let raise until double 15min or so.

Roll into 6 inch circles and bake for 6 min at 400*

Cool and place in to Ziploc sandwich bags. Place a bag of cheese, bag of pepperoni, a bag of sauce (sauce recipe found at the end of the post).

I place all of the them into one giant Ziploc and place in the freezer. They are great and by the time lunch comes everything is still cold and unthawed. They are even great for the kids for a meal when things are a little crazy. So under one hour and less then $7.00 I have 20 pizza lunchables for the kiddos. They love them and constantly have friends wanting to trade with them.

Pizza sauce
1 8oz can of tomato sauce
1 tsp Italian seasoning
1 tsp of brown sugar
Heat all ingredients through and place 1 lg. Tbls into a bag.

Tuesday, August 24, 2010

getting the chores done

One day after I had just finished teaching a class on family organization, a friend approached me and asked, "How did you come up with all of your ideas and chore chart system?"  For lack of a better answer, I gave her my simple one-"frustration."  I have found that if necessity is the mother of invention then frustration must be the mother of organization.
Managing a family of seven and having a strong desire to be organized along with not having great natural organizational skills can cause some frustration.   I have learned to compensate with a lot of creativity and a lot of learning as much as I can from others.  Over time, we have figured out ways to keep our family organized and on schedule even during the chaos.
This week we will be sharing lots of these ideas and details about family organization and chore systems.  But for today, here are a few simple tips that we have learned along the way.

Family organization and chore charts systems:

1.  Keep it Simple:  There are a lot of family chore system ideas out there, but many of them are too complicated to keep up through real life.  They work great for the first week or two, but then as a change in a work schedule, a new soccer season, strep throat for the whole family or a new baby comes along, they are just too hard to keep up. 

2.  Start While Your Kids are Young:   Children who can walk and talk can do simple chores and begin to care for themselves.  Toddlers and preschool age children especially love to feel involved and helpful, but this is also true for older children.  Use their enthusiasm to do things for themselves, to teach them responsibility. 

3.  Spell it Out:  Kids do not really know what it means when we as parents say, "Get ready to go today" or "Go clean your room".  They work much better with small assignments.  Give them some sort of list of what they need to do in the morning and a list of things that they need to do to clean their room.  Pictures may be helpful on the lists.  Even if they are readers, pictures are just more fun.

4.  Work as a Team:  Give kids chores when they are young, but work along with them and train them as you go.  Working together is great one on one time and it will all pay off as they learn to do jobs well on their own.  Rotate chores and give everyone a turn.  This helps everyone to feel that things are fair and that your family works together as a team.  This feeling is important in families.

5.  Let Kids be Responsible for Their Choices:  Help children have a good understanding of what their chores are and what happens when they complete or do not complete their chores. Give them some simple and positive incentives to finish.

6.  Use Creativity, Humor, and Fun:  It is what kids (okay all of us) respond to well.  Use these things in abundance and any job is more fun.


The chart above is protected by a copyright and is not to be copied for commercial use.

Monday, August 23, 2010

getting ready for the day

The morning rush can be a crazy time of day and telling a child to hurry and get ready, may just get you that familiar blank stare.  The process of getting ready seems fairly normal to an adult but can be a bit harder for the little ones.  Kids complete larger tasks easier if they are split into smaller assignments.  To help them (and you) out in the morning, create of list of morning tasks that they can look at and check off some how.  It may just take the whole process from wild to wonderful.
Here are a few tips:
  • Use pictures for younger children.
  • Start with just a few tasks and work up to more.  Don't make the final list too long.
  • Give them some easy things like eat breakfast and get dressed (the easiness of these may depend on the child).  It helps them to stay motivated to finish the other things.
  • Let them learn responsibility to complete the list and then show you when they are done. 
  • If you want to include a reward for finishing but here are two things to keep in mind:  Adults finsh their morning tasks in order to do the rest of the exciting things for the day.  Adults may get benefits but they don't usually get paid money for getting ready in the morning.

The list making idea also works well when you say "go clean you bedroom" or "it is your job to clean the bathroom today".

The charts above are protected by a copyright and not to be copied for commercial use.

Sunday, August 22, 2010

family chores

One of the best bits of parenting advice that I ever received came in a casual conversation in a group of moms.  One of them shared with us how she had divided chores between her children.  Each child had a different kitchen chore each day and a different room in the house to care for.  The chores were rotated through the family so that each had a turn at each chore.

I loved this idea because:
It is the simple, easy and worked well.
It keeps the chores fair and no one can say "I have to do that all the time".
Everyone who eats, gets a chance to cook and clean-up.
Everyone who lives in the house, has a part of it to clean up.

To give you some ideas on how it may work, here is how it works at our house.
Each of our five children's names are on a chart.  For every day of the week they each have a different kitchen job and for the week there is a room in the house that is their responsibility to pick-up/clean.

Our kitchen jobs are:
Chef-  Decides the dinner menu from the weekly menu list,assists in preparing dinner and sets the
table.
Clear Table:  Clears the table, puts away all leftover food, and wipes off the table.
Dishes:  Loads the dishwasher, washes any extra dishes, and wipes counters.
Dishwasher:  Puts away all clean dishes from the dishwasher or drying rack.
Sweep:  Sweeps the floor and takes out the garbage.

This has been a great way to spend one on one time with the kids.  One of the best times of the day is making dinner with the child who has chef and chatting about their day.  They are learning reading and math as we follow recipes and on busy night our teenagers can make a great dinner on their own, because they have been learning this way for so long.


Our weekly jobs are:
Living Room- Family Room- Kitchen- Bathroom- Playroom  --Pick up each day and clean on cleaning day.

The kids each have their favorites and least favorites but it helps them to understand that it all needs to be done.  When company calls and a quick clean-up is in order, everyone knows what they job is.  And after being responsible for picking up a highly used room for a week,  they are more careful about leaving their own stuff around.

This has been a great system at house for many years.  I love when I need something done, I know who to ask and that it creates of feeling fairness and teamwork.  Hopefully if you are reading this, looking for some inspiration for your family,  this have given you some ideas.


The chart above is protected by a copyright and is not to be copied for commercial use.

Saturday, August 21, 2010

the general family store

My husband and I have spent the last few weekends on ladders painting the outside of our house.  Our kids have been so excited to paint until they learn that most of the work is really cleaning, repairing, and taping.  Their enthusiasm dwindles and they begin asking, "Why are we doing this, again".  It has been a good reminder of one of the most important principles that I have learned as a parent.   This being that : the feeling of joy for a job well done is learned response after lots of experience and not a natural reaction.  Kids can work and help, but they do not get the same sense of accomplishment we as adults do.  They may need a little extra incentive for a while until they grow and learn through expereience.  So basicly, until they learn that they feel better and can function better in a clean room, they don't care and may need some other reason for cleaning it.  (Some of us may take a little longer than others to reach this point and may need to use the reward system longer or maybe say, forever.)  As was mentioned in an earlier post, money may not be the best reward option, because getting paid to clean up after yourself is unrealistic.  Getting extra free time, fun activities, and other rewards may be a little closer to real life. 
This is where the family store comes in.

Here is how the basic idea works:
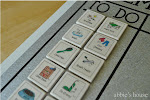
Kids complete a list of tasks
Kids receive some sort of token for that.
Kids get to barter with the tokens for what they want.

Here are the tips for implementing the idea:
  • Use humor, fun and creativity!!
  • Make sure the completion of tasks is well understood for both you and them.
  • Tokens can be anything you want:  marbles, the little tickets you buy in a roll, self created family dollars etc. (this may be a fun little family acitvity- create you own monetary system and design the currency)
  • Kids should be responsible for completing their own tasks, requesting the "family dollar" and then keeping those "dollars" in a safe place.  If needed the bank may decide to give away free savings envelopes to their customers.
  • Find an area of the house to set up the store.  We like to use a cupboard in a central area that we can close or that we can leave open to display all of the wonderful options available.  This can be a good opportunity to use, learn and teach marketing.
  • Fill the store with things that you kids think are fabulous.
Store products will be different for everyone but  may include:

certificates for: a day without chores, a trip to the movies, a personal night out with Mom and Dad, a fresh batch of homemade playdough, a trip to the zoo, a trip to the bookstore and free book, cookie making night, a date with grandma, a backyard party with friends, screen time, etc.
toys
candy
accesories for well loved toys -dolls, trains, action figures, bikes, vidoe games,etc.
sporting equipment
hair  and clothing accesories
seasonal items--sidewalk chalk, diving toys, cook back to school supplies, trick or treat flashlights, etc.
gift items for others
small items like playdough, bubbles, jacks, cars, etc.


We have loved this idea because:
Our kids are much more excited to complete chores if they are working towards something.
They have learned to be responible to not only earn "dollars" but to keep track of them.
They have learned that they may not be able to have eveything at once but to work for one thing at a time.
They have learned a little about marketing--seeing things make us want them more, exchange rate--when they want something at the store they are quoted the family dollar price, and convience store prices--candy can be expensive there.
And mostly because we have watched our kids who cleaned their room and loaded the dishwasher for a little reward, grow into teenagers who clean their room because it creates a better place to study and hang out with friends and who load the dishwasher simply because it needs to be done.

If you have any questions about the family store, leave us a comment, we would be happy to share anything we have learned.

Friday, August 20, 2010

paper pencil

With school starting around the corner. What teacher wouldn't love to get this adorable personalized pencil. I found this idea at Creating Keepsakes Magazine. And then it just so happened that it was on Studio 5 this week. 

Supplies needed:
A roll of Rollo's candy
Hersey kiss
Yellow paper
aluminum foil
pink paper
scissors
tape or glue
and embellishments for the star and ribbon

Studio 5 has awesome instructions of how to assemble this cute pencil. While you are there check out all the other fun things they have for back to school.
Related Posts with Thumbnails